

This vanilla bean paste recipe produces a thick, seed-flecked concentrate that combines the convenience of extract with the visual drama of scraped vanilla caviar. Unlike store-bought versions that often rely on thickeners and stabilizers, this method uses whole beans, pure extract, and a small amount of sugar to build body and preserve the paste without compromising flavor.
Key takeaways
- You'll make 4 to 6 ounces of paste using 3 to 4 beans, 1/4 cup extract, and 2 tablespoons sugar in about 15 minutes of active work.
- Grade A beans work best for their higher moisture and visible seeds; Madagascar and Uganda origins deliver classic, creamy flavor.
- The paste is ready to use immediately and stays fresh for up to 12 months in a sealed jar at room temperature.
- Use 1 teaspoon of paste to replace 1 teaspoon of extract plus the seeds of half a vanilla bean in any recipe.
- Common problems like separation or grittiness come from insufficient blending or using low-proof alcohol (aim for 70 proof or higher).
What you'll make and how long it takes
You can scale the recipe up or down, but keep the ratio of beans to liquid roughly the same. For every vanilla bean, plan on 1 tablespoon of extract and about 1.5 teaspoons of sugar. That balance keeps the paste thick enough to cling to a spoon but fluid enough to measure and stir into batter.
What you need: beans, extract, sugar, and container
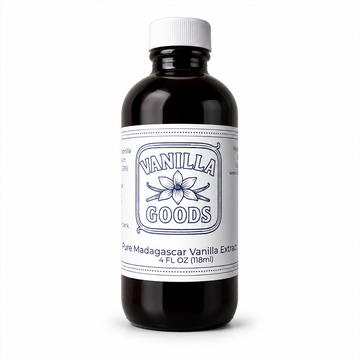
Start with 3 to 4 whole vanilla beans, preferably Grade A for their plump, moist pods and abundant seeds. Grade B beans will work, but they tend to be drier and may yield slightly less paste. You'll also need 1/4 cup (2 fluid ounces or about 60 ml) of vanilla extract at 70 proof or higher. Homemade extract works beautifully here; if you've been making your own vanilla extract, this is a perfect next step. Store-bought pure extract is fine, too, but avoid imitation vanilla, which won't deliver the complexity you want.
Add 2 tablespoons (about 25 grams) of granulated sugar. The sugar does double duty: it thickens the paste slightly as it dissolves and helps preserve the mixture by binding water. Some recipes call for corn syrup or honey, but plain white sugar keeps the flavor clean and won't interfere with the vanilla. You'll also need a small saucepan, a fine-mesh strainer or small blender, and a 4-ounce glass jar with a tight-fitting lid for storage. A spice grinder or immersion blender makes quick work of the final puree, though a fork and patience will get you there.
Choosing your beans by origin
Madagascar beans are the workhorse choice for paste: creamy, sweet, and rich in vanillin, they pair well with virtually any baking application. Ugandan beans bring a bit more chocolate and dried-fruit character, which shines in brownies, custards, and dark cakes. Tahitian beans, with their floral, cherry-like notes, make a beautiful paste for lighter desserts like panna cotta or whipped cream, but their lower vanillin content means you may want to use an extra bean. Mexican vanilla offers a spicy, smoky edge that works in spiced cookies and caramel sauces. For a detailed breakdown of how origin affects flavor, see our guide to single-bean versus blended vanilla extract.
Step-by-step method
Here's the process from bean to jar, broken into five numbered steps. The ratios and weights below are for a standard batch; if you're doubling the recipe, keep the same proportions.
- Split and scrape the beans. Lay each vanilla bean flat on a cutting board and use a sharp paring knife to slice it lengthwise, leaving about half an inch intact at one end. Open the pod like a book and run the back of the knife down the inside to scrape out the moist, sticky seeds. Collect the seeds and the split pods in a small bowl. For a visual guide to this technique, check out how to scrape vanilla seeds like a pastry chef.
- Combine beans, seeds, extract, and sugar. Transfer the scraped seeds and pods to a small saucepan. Pour in 1/4 cup of vanilla extract and add 2 tablespoons of granulated sugar. Stir gently to dissolve the sugar, then bring the mixture to a bare simmer over medium-low heat. You want gentle bubbles, not a rolling boil, which can drive off alcohol and volatile aromatics.
- Simmer and reduce. Let the mixture simmer for 8 to 10 minutes, stirring occasionally, until it reduces by about one-third and turns syrupy. The pods will soften and release additional flavor compounds into the liquid. If the mixture starts to stick or scorch, lower the heat and add a teaspoon of water.
- Cool and blend. Remove the saucepan from the heat and let it cool for 5 minutes. Fish out the split pods and either discard them or reserve them for a second use (they still have flavor). Pour the syrup and seeds into a blender or spice grinder and pulse until smooth and thick. If you don't have a blender, press the mixture through a fine-mesh strainer with the back of a spoon, then whisk vigorously to incorporate the seeds. The goal is a uniform paste with visible black specks throughout.
- Jar and store. Scrape the paste into a clean 4-ounce glass jar, seal it tightly, and label it with the date. The paste is ready to use right away. Store it at room temperature in a dark cupboard for up to 12 months. Give the jar a quick shake or stir before each use to redistribute the seeds.
Timeline: what changes over time
Vanilla bean paste doesn't age the same way extract does, since most of the extraction work happened before you made the paste. Still, the flavor will evolve slightly as the mixture rests. In the first week, the paste tastes bright and a little boozy, especially if you used fresh extract. By week two, the alcohol bite fades and the vanilla flavors knit together into a rounder, more cohesive profile. At the two-month mark, the paste reaches its peak: smooth, balanced, and ready for high-stakes baking projects like crème brûlée or vanilla bean ice cream.
After six months, the paste remains perfectly usable but may start to lose some of its brightest top notes. The seeds will settle to the bottom of the jar, so a quick stir brings everything back into suspension. If you notice the paste thickening too much, you can thin it with a teaspoon of extract or vodka. Conversely, if it feels too runny, whisk in a pinch of sugar and let it sit for a day to thicken.
Troubleshooting: cloudy, weak, bitter, or gritty paste
Cloudy paste usually means your extract was too cold when you started or the sugar didn't fully dissolve. Reheat the mixture gently, stir until the sugar disappears, and blend again. Weak flavor points to either low-quality beans or extract that hasn't aged long enough. If your extract is less than two months old, it won't have developed the full spectrum of vanillin and supporting compounds; give it more time or start with a more mature batch. For insight into how aging affects flavor, read our month-by-month guide to aging vanilla extract.
Bitterness can come from over-reducing the mixture or using extract made with alcohol below 70 proof. Lower-proof spirits contain more water, which can extract harsh tannins and astringent compounds from the bean pods. If your paste tastes bitter, try blending in an extra teaspoon of sugar or a splash of higher-proof vodka to balance it. Grittiness is almost always a sign that the sugar didn't dissolve fully or the paste wasn't blended long enough. Pulse the mixture for another 30 seconds, and if that doesn't work, pass it through a fine strainer to catch any remaining granules.
Sediment at the bottom of the jar is normal and desirable: that's the vanilla seed mass settling out. Just stir it back in before you measure. If you see mold or off smells, the paste was likely exposed to moisture or stored in a humid environment. Vanilla paste made with proper alcohol content and kept in a sealed jar should stay stable for a year or more.
Which beans to use and why
Grade A beans are the best choice for paste because their higher moisture makes them easier to scrape and blend into a smooth, seed-rich puree. Grade B beans, often marketed as "extract grade," work in a pinch but tend to be drier and may require an extra tablespoon of liquid to reach the right consistency. For a primer on the differences, see our breakdown of vanilla bean grades.
Origin matters more for flavor than for texture. Madagascar beans deliver the classic sweet, creamy profile most people associate with vanilla: think custard, cake, and buttercream. Ugandan beans add depth with notes of milk chocolate and dried fruit, which work beautifully in richer applications like brownies or caramel. Tahitian beans bring floral, fruity aromatics that shine in no-bake desserts and whipped cream, though you'll want to use four beans instead of three to compensate for their lower vanillin content. Mexican vanilla offers a warm, spicy edge that pairs well with cinnamon, clove, and dark chocolate.
If you're making paste for gifts, consider blending origins: two Madagascar beans and one Ugandan bean, for example, gives you a complex, layered flavor that stands out in side-by-side tastings. Just label the jar with the origins so the recipient knows what they're working with.
Common mistakes and pro tips
The most common mistake is using extract that's too young. If your homemade vanilla hasn't aged for at least two months, it won't have enough dissolved vanillin to build a robust paste. Wait until the extract is dark, fragrant, and smooth before you turn it into paste. Another pitfall is over-reducing the mixture on the stovetop. A gentle simmer is all you need; a hard boil drives off alcohol and some of the delicate esters that give vanilla its complexity.
Pro tip: save the spent bean pods after you've scraped them. You can add them back to your extract jar to keep the extraction going, or dry them and grind them into vanilla powder. For a dozen ideas, see our guide to reusing spent vanilla pods. Another trick is to add a tablespoon of paste to your extract jar once the paste is made. The seeds will continue to infuse the alcohol, and you'll end up with an even richer extract over time.
If you're making paste as a gift, pour it into small 2-ounce jars with handwritten labels that include the bean origin and the date. Pair the jar with a recipe card for something simple like vanilla bean scones or a homemade vanilla latte. People love knowing exactly where their vanilla comes from and how to use it.
Start with the right beans
For paste that balances flavor, cost, and ease of use, we recommend Madagascar Vanilla Beans, Grade A, in a 4-ounce bag. This size gives you enough beans to make multiple batches of paste and experiment with ratios without committing to a large bulk order. The beans are plump, moist, and packed with seeds, and Madagascar's classic creamy profile works in virtually any baking context. If you're already making extract and want to dive deeper into the craft, the 4-ounce bag is the sweet spot for home extract makers and serious bakers who want consistent, high-quality results.
Frequently asked questions
Can I use Grade B beans to make vanilla paste?
Yes, Grade B beans will work, but you'll need to adjust the recipe slightly. Because Grade B beans are drier, they contain fewer seeds by volume and may yield a thinner paste. Add an extra bean or increase the sugar by a teaspoon to help thicken the mixture. The flavor will be just as good, though you may notice a slightly less creamy texture compared to paste made with Grade A beans.
How much vanilla paste equals one vanilla bean?
One teaspoon of homemade vanilla paste roughly equals the seeds scraped from half a vanilla bean plus half a teaspoon of extract. If a recipe calls for one whole bean, use 2 teaspoons of paste. Because paste is concentrated, start with a little less than you think you need, taste, and adjust. The seeds in the paste add visual appeal and bursts of flavor that extract alone can't replicate.
Can I make vanilla paste without extract?
Not successfully. Vanilla paste relies on alcohol to extract and preserve the flavor compounds from the beans. If you skip the extract, you'll end up with a seedy, flavorless syrup that won't keep well. If you don't have extract on hand, you can substitute vodka or bourbon at the same proof, but the paste won't taste like vanilla until the alcohol has had time to pull the vanillin and esters from the beans. At that point, you're better off making extract first and then turning it into paste once it's aged.
Why did my vanilla paste separate?
Separation happens when the sugar syrup and the alcohol-based extract don't fully emulsify, usually because the mixture wasn't blended long enough or cooled too quickly. To fix it, pour the paste back into a blender, add a teaspoon of warm water, and blend for 30 seconds. If it separates again after sitting, just give the jar a quick shake before each use. A small amount of separation is normal and doesn't affect flavor or performance.
How long does homemade vanilla paste last?
Properly stored in a sealed glass jar at room temperature, homemade vanilla paste stays fresh for up to 12 months. The alcohol content acts as a preservative, and the sugar helps bind moisture. Keep the jar in a cool, dark cupboard away from heat and direct sunlight. If you notice mold, an off smell, or a significant change in color, discard the paste. Otherwise, it will remain stable and flavorful for a year or more.
Turn your extract into paste
Vanilla bean paste is one of the most versatile forms of vanilla you can make at home. It combines the convenience of extract with the visual appeal of scraped seeds, and it's ready to use in everything from frosting to custard to whipped cream. If you're already making your own extract, this recipe is a natural next step. Grab a small bag of Grade A beans, set aside a quiet afternoon, and build your vanilla pantry one jar at a time. For more extract and paste projects, visit our complete guide to homemade vanilla extract and keep experimenting.
Sources
- eCFR :: 21 CFR 169.175 -- Vanilla extract, U.S. Government Publishing Office (current)


Article Comments
0 commentsNo comments yet — be the first to share how this turned out for you.
Leave a comment