

When you're deciding between homemade vs store-bought vanilla extract, the economics and quality tell a clear story: making your own delivers premium results at a fraction of the cost, but only if you're willing to wait six to twelve months for aging and commit to a simple kitchen ritual. For frequent bakers, that patience pays off in hundreds of dollars saved over the years and a pantry stocked with extract that often surpasses what you'd find on store shelves.
Key takeaways
- Homemade extract costs $8–16 per 8 oz vs $35–60 for premium commercial, saving 50–75%.
- You control every variable: bean origin, alcohol type, strength, and aging time.
- Initial setup takes 15–30 minutes; aging requires 6–12 months for full flavor development.
- Store-bought wins for immediate needs, rare baking, or minimal kitchen projects; homemade wins for quality, customization, and long-term value.
The Verdict: Homemade for Serious Bakers, Store-Bought for Convenience
If you bake monthly or more and care about what goes into your food, making your own vanilla extract is the smart play. You'll spend a few minutes splitting beans and pouring vodka into a jar, then wait while time does the work. The result is a bottle of extract you understand completely—you chose the beans, you picked the alcohol, you controlled the strength—and it costs roughly a quarter of what you'd pay for comparable quality at retail. That first batch requires patience, but once it's ready you can keep topping off the jar with fresh vodka and beans indefinitely, effectively creating a lifetime supply.
On the other hand, if you bake twice a year or need extract this weekend for a birthday cake, buying a bottle makes perfect sense. Premium commercial extract is ready to use, professionally blended, and takes up no mental space beyond the grocery aisle. There's no shame in convenience when your time and attention are better spent elsewhere. The comparison isn't really about which option is "better" in some absolute sense; it's about which one fits your life.
Many bakers do both: they buy a small bottle of premium extract to use now while their first homemade batch ages in the back of the pantry. Six months later, they're pouring from their own jar and refilling it as needed. That hybrid approach gives you the best of both worlds—immediate access and long-term savings—without leaving you vanilla-less while you wait.
Side-by-Side: What You Get from Each
| Factor | Homemade Extract | Store-Bought Extract |
|---|---|---|
| Flavor | Deep, complex, customizable by origin and alcohol; improves with age beyond 12 months | Consistent, professionally blended; quality varies widely by brand and price point |
| Cost per 8 oz | $8–16 (about $0.17–0.33 per teaspoon) | $35–60 premium (about $0.40–1.00 per teaspoon) |
| Time investment | 15–30 minutes setup; 6–12 months aging; weekly shaking first month, monthly after | Zero—buy and use immediately |
| Control | Full: choose bean origin, alcohol type, strength, aging duration | None: accept manufacturer's choices |
| Best for | Frequent bakers, DIY enthusiasts, long-term planners, quality-focused cooks | Rare bakers, immediate needs, minimal storage, convenience-first shoppers |
| Ongoing cost | Refill with beans and vodka as needed; jar lasts indefinitely | Repurchase every time you run out |
The table makes one thing obvious: homemade extract is a time-for-money trade. You invest a few minutes of active work and months of passive aging in exchange for dramatic cost savings and total creative control. Store-bought is the opposite trade: you pay a premium to skip the wait and the craft. Neither is wrong; they serve different priorities.
Homemade Extract: The Economics and Process
Making vanilla extract at home is almost absurdly simple, which is part of why it feels so satisfying. You need three to four vanilla beans—Grade B beans work perfectly because they're drier and less expensive than Grade A, yet contain the same concentration of vanillin and other flavor compounds—and one cup of vodka at 40% alcohol by volume. (That's standard 80-proof vodka, the kind you'd find on any bottom shelf.) Split the beans lengthwise to expose the seeds and inner paste, drop them into an 8-ounce mason jar, pour the vodka over them until they're completely submerged, and seal the jar tightly. Store it in a cool, dark cupboard, shake it gently once a week for the first month to redistribute the flavor compounds, then monthly after that. At six months you have usable extract; at twelve months you have something genuinely excellent.
The cost breakdown is straightforward. Vodka runs $5–10 for the cup you need (a fifth of decent vodka yields about three cups, so one bottle can start three jars of extract). Three to four Grade B vanilla beans cost $3–6 depending on origin and market conditions. A mason jar is a one-time $2–3 expense. Total: $8–16 for 8 ounces of extract. Compare that to $35–60 for a premium 8-ounce bottle at retail, and you're looking at savings of $20–44 per batch, or 50–75% off the commercial price. If you're a frequent baker using 8 ounces a year, that's $20–44 saved annually. Over ten years, that's $200–440 back in your pocket—real money that adds up quietly over time.
The beauty of the homemade method is that it scales beautifully. Once you've finished the first jar and proven to yourself that this works, you can make a quart-sized batch (32 ounces) for $15–25 in materials. At that scale, your cost per teaspoon drops to $0.08–0.13, and you've got years of extract on hand. You can also customize strength by adding more beans: standard is three to four beans per cup, but you can go up to six or eight beans for a double-strength extract that rivals anything sold as "gourmet" or "extra-strength." The control is entirely yours.
One of the most practical aspects of homemade extract is that it's a perpetual project. When you've used half the jar, top it off with fresh vodka and add a bean or two. The original beans continue to infuse flavor—vanilla beans can stay productive in a jar for years—and the extract just keeps getting better. Some bakers have jars they started a decade ago that they've refilled dozens of times. It becomes a living pantry staple, always ready, always improving. If you want to explore different flavor profiles, you can try vodka vs bourbon vs rum as your alcohol base, or experiment with Bourbon, Tahitian, and Mexican vanilla bean origins to see how each transforms the final extract.
Store-Bought Extract: When Convenience Matters
There are real reasons to buy vanilla extract instead of making it, and the first is time. If you're baking a pound cake for Sunday dinner and you're out of extract on Friday, you can't brew six months of patience in a weekend. Store-bought extract is there when you need it, no waiting, no planning ahead. It's professionally blended, lab-tested for consistency, and designed to deliver predictable results every time you open the bottle. That reliability matters when you're following a tested recipe or running a small bakery where variance is the enemy.
Quality varies enormously across commercial brands. Premium options—the ones that cost $35–60 for 8 ounces—typically use high-quality beans, careful aging, and minimal additives. They're excellent products, and if you tried them blind against well-made homemade extract, you might struggle to pick a winner. Mass-market premium brands (the $20–30 range) can be hit-or-miss: some are quite good, others taste thin or include corn syrup and artificial flavoring to stretch the real vanilla. Budget options under $15 are almost always disappointing, relying heavily on synthetic vanillin and delivering a one-note, chemical sweetness that experienced bakers can spot immediately. The lesson here is that if you're going to buy extract, buy the good stuff. Cheap vanilla isn't a bargain; it's a waste of money that undermines everything you bake.
Store-bought extract also makes sense if you bake very rarely—say, a batch of cookies at Christmas and maybe a birthday cake once a year. At that usage rate, an 8-ounce bottle might last you five years, and the $40 you spend up front is effectively $8 per year. The economics of homemade don't really work in your favor if you're not using enough volume to justify the setup and aging process. Similarly, if your storage space is limited or you're living in a temporary situation where you can't commit to a jar aging in a cupboard for months, buying extract is the practical choice.
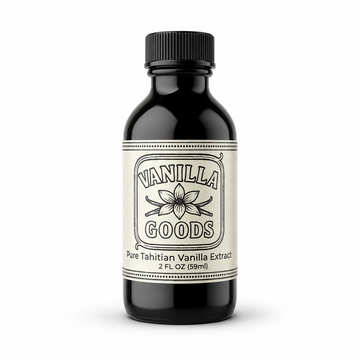
Another scenario where store-bought shines is when you want specialty extracts that are difficult or expensive to make at home. Tahitian vanilla, for example, commands a premium price per bean, and sourcing enough beans to make a full jar can get pricey. If you want to try Tahitian's floral, fruity character in a specific recipe without committing to a whole batch, buying a small bottle lets you experiment affordably. The same logic applies to aged or barrel-finished extracts that involve techniques beyond simple infusion. Sometimes the craft is worth paying someone else to do.
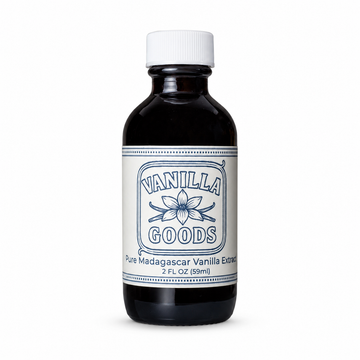
Finally, there's the social and gift angle. A beautifully labeled bottle of premium vanilla extract from a boutique maker is a lovely gift or a special pantry item to display. Homemade extract in a mason jar has its own charm, but it doesn't have the polish or brand story that some people value. If presentation matters to you, commercial extract delivers that immediately. For more on how extract compares to other vanilla forms, see our guide on vanilla extract vs vanilla essence.
When to Choose Each (and When to Do Both)
The decision tree is simpler than it first appears. Choose homemade when you bake frequently—monthly or more—and quality matters to you. If you enjoy kitchen projects, appreciate knowing exactly what's in your food, and value long-term savings over short-term convenience, making your own extract is a no-brainer. It's especially smart if you're already buying premium beans for other uses, because the beans you'd scrape for a single cake can become a jar of extract that serves you for years. You'll also love homemade if customization appeals to you: the ability to dial in strength, blend origins, or experiment with bourbon or rum as your base turns extract-making into a creative outlet rather than a chore.
Choose store-bought when you bake rarely—a few times a year at most—or when you need extract immediately and don't have a stash aging at home. If storage space is tight, or if kitchen projects feel like burdens rather than joys, there's no reason to force yourself into making extract. Convenience is a legitimate priority, and a bottle of good commercial extract will serve you reliably without any mental overhead. Store-bought also makes sense if you're experimenting with origins or strengths and want to try small amounts before committing to a full batch. A 2-ounce sampler bottle of Tahitian or Mexican extract lets you test-drive a flavor profile in a few recipes before deciding whether to make a quart of it at home.
The "do both" approach is surprisingly common among serious bakers. You buy a bottle of premium extract to use now while you start your first jar of homemade. Six months later, your homemade is ready, and you switch to pouring from that jar. The commercial bottle becomes your backup—travel extract for holiday baking at a relative's house, or a loaner bottle to give a friend who's curious about vanilla. Over time, your homemade jar becomes the workhorse, and you only buy commercial when you want to try a new origin or run out of beans and vodka at an inconvenient time. This hybrid strategy eliminates the downside of waiting while still capturing the long-term value of making your own.
Another reason to do both is if you're building a collection of different origins. You might make a large batch of Madagascar extract at home—the classic, versatile workhorse—while keeping smaller bottles of Tahitian and Mexican extract on hand for specific applications. Madagascar in bourbon-based alcohol becomes your go-to for chocolate desserts and custards, Tahitian goes into fruit tarts and delicate pastries, and Mexican extract finds its way into spice cakes and churros. That kind of pantry depth is expensive to buy outright but very affordable if you're making the bulk of it yourself. For detailed guidance on choosing beans, see best vanilla beans for homemade extract.
Step-by-Step: Making Your First Batch
If you've decided to try making extract, here's the simplest possible process:
- Split the beans. Take three to four vanilla beans (Grade B is ideal) and use a sharp knife to slice them lengthwise from top to bottom, leaving one end intact so the bean stays in one piece. This exposes the seeds and paste inside, which is where most of the flavor lives. Alternatively, you can cut the beans into 1- to 2-inch pieces for more surface area and faster extraction.
- Place beans in a jar. Drop the split beans into a clean 8-ounce mason jar or any glass container with a tight-fitting lid. Glass is important; plastic can absorb flavors and degrade over time.
- Pour vodka over the beans. Fill the jar with 1 cup (8 ounces) of vodka at 40% ABV or higher. Make sure the beans are completely submerged; if they poke out, they can dry out and develop off flavors. You can use any neutral vodka—no need for premium brands, though cleaner vodka does yield slightly cleaner-tasting extract.
- Seal and store. Screw the lid on tightly and store the jar in a cool, dark place: a pantry, a cupboard, or even a closet. Light and heat can degrade flavor compounds, so darkness and stable temperature are your friends.
- Shake weekly, then monthly. For the first month, shake the jar gently once a week to redistribute the vanilla particles and help the extraction process along. After the first month, shake it monthly. Each time you shake, you'll see the liquid grow darker and richer.
- Wait six to twelve months. At six months, you have usable extract—it will smell and taste like vanilla, and you can start baking with it. At twelve months, it's fully mature: complex, smooth, with no harsh alcohol notes. Beyond twelve months, it just keeps getting better.
- Use and refill. When you've used about half the jar, top it off with fresh vodka and add another bean if the flavor starts to thin. The original beans will keep working for years, and your jar becomes a self-renewing resource.
That's the entire method. There are no secret techniques, no special equipment, no tricky steps. The hardest part is waiting, and even that is passive—you're not doing anything, just letting time work for you. If you want to dive deeper into the process, read our full guide on how to make homemade vanilla extract.
Common Mistakes and Pro Tips
Most mistakes in homemade extract come from impatience or misunderstanding what good vanilla looks like. The first mistake is using too few beans. Three beans per cup is the minimum for decent strength; two beans will extract, but the result will be weak and watery. If you're going to invest the time, use at least three beans, and consider four or five if you want something closer to commercial double-strength. Related: some people worry that Grade B beans are "worse" than Grade A because they're drier and less expensive. In reality, Grade B beans have the same vanillin content and actually extract better because their lower moisture content means more concentrated flavor per gram. Save your Grade A beans for recipes where you're scraping the caviar into a custard; use Grade B for extract. We cover this in detail in Madagascar vs Indonesian vanilla.
The second mistake is opening the jar too often to smell or taste the extract. Every time you open the lid, you lose volatile aromatic compounds to the air. It's tempting to check progress weekly, especially in the first few months when the transformation is dramatic, but resist the urge. Shake it, look at the color through the glass, and leave it sealed. You'll get a better final product if you limit air exposure.
A third mistake is using alcohol that's too weak. Vanilla's flavor compounds are alcohol-soluble, and extraction efficiency drops sharply below 35% ABV. Standard 80-proof vodka (40% ABV) is perfect. If you go lower—say, a 60-proof liqueur—you'll extract some flavor, but it will take much longer and the result will be less concentrated. On the flip side, using higher-proof alcohol (like Everclear at 75% ABV) extracts aggressively but can pull harsh, bitter notes if you're not careful. Stick with 40% unless you're experimenting deliberately.
Pro tip: store your aging extract in a place you'll see regularly, even if it's dark. The back of a rarely-opened cupboard means you'll forget to shake it and lose track of aging time. A pantry shelf you open daily keeps the jar in your mental rotation. Label the jar with the start date and bean origin so you know exactly what you have when you open it a year later.
Another pro tip: don't throw away spent beans after a year or two. Even when they've given up most of their flavor to the extract, they still carry vanilla aroma and can be rinsed, dried, and buried in a jar of sugar to make vanilla sugar. Or toss them into a pot of simmering milk for vanilla-scented hot chocolate. Beans are expensive; use them completely. If your homemade extract ever tastes bitter, it's usually because the beans weren't fully submerged or the jar was opened too often; our troubleshooting guide on bitter homemade vanilla extract covers how to fix it.
Finally, a pro tip for scaling up: if you decide to make a quart or more, consider using multiple smaller jars instead of one giant jar. Smaller jars are easier to shake, easier to store, and let you experiment with different origins or alcohol bases side by side. You can have one jar of Madagascar beans in vodka, another of Tahitian beans in rum, and a third that's a blend of both. It's the same amount of work but gives you a much more interesting pantry. For more pitfalls and fixes, see common mistakes making homemade vanilla extract.
The Right Beans for Your First Batch
If you're ready to start your first jar, the beans you choose matter more than the vodka brand. Madagascar vanilla beans are the obvious starting point: they deliver the classic vanilla flavor most of us grew up with—rich, creamy, sweet, with strong vanillin-forward character. Madagascar Grade B beans are the workhorse for extract-making. They're drier than Grade A, which means they're less expensive per bean and actually extract more efficiently because there's less water content diluting the alcohol. A 5-bean pack or a small bulk bag gives you everything you need for your first few jars, and you'll end up with extract that tastes exactly like what you'd expect premium vanilla to taste like.
Uganda beans are another excellent choice for beginners. They're similar in profile to Madagascar—bold, creamy, versatile—but often slightly more affordable and just as high-quality. If you're making extract for everyday baking—cookies, cakes, pancakes—Uganda beans will serve you beautifully and save you a few dollars on the front end. The flavor difference between Ugandan and Madagascan extract is subtle enough that most home bakers won't notice in finished baked goods, though vanilla enthusiasts might pick up on Uganda's slightly earthier undertone. Either origin will give you a reliable, delicious result.
Tahitian beans are worth trying once you've made a successful batch with Madagascar or Uganda and want to explore something different. Tahitian vanilla is floral, fruity, and lighter—less about vanillin punch and more about nuanced cherry, anise, and almond notes. It's stunning in delicate applications like panna cotta, fruit tarts, or whipped cream, but it can get lost in chocolate-heavy desserts. Tahitian beans are pricier per bean, so they're not the most economical choice for your first extract experiment, but they're a wonderful second or third project once you've proven to yourself that this whole process works.
For a first batch, we'd recommend starting with Madagascar Vanilla Beans, Grade B, 4oz bag, which gives you enough beans for multiple jars and the flexibility to experiment with strength and aging time. If you want to test the waters with a smaller commitment, a 5-bean pack of Madagascar Grade B is enough for one 8-ounce jar with a little left over for baking. Once you've tasted your own extract and realized how good it is, you'll likely move up to larger quantities. An 8oz bag of Madagascar Grade B or Uganda Grade B beans becomes the cost-effective way to keep your perpetual jar going indefinitely. For long-term storage and refilling strategies, see how to store, age, and refill vanilla extract.
Can you make vanilla extract with Grade A beans?
Yes, you can make extract with Grade A beans—they'll work perfectly fine—but it's not the most economical choice. Grade A beans are plump, moist, and gorgeous, which makes them ideal for scraping seeds into recipes where you want visible vanilla specks and maximum aroma. But that extra moisture content means you're paying for water weight that doesn't contribute to extraction. Grade B beans are drier, often split or slightly scarred, and sold at a lower price because they're not as visually appealing. Yet they contain the same concentration of vanillin and flavor compounds, and they extract just as well—arguably better, since there's less water to dilute the alcohol. Save your Grade A beans for custards and pastry cream; use Grade B for extract.
How long does homemade vanilla extract last?
Homemade vanilla extract lasts indefinitely when stored properly—decades, even. Alcohol is a preservative, and at 40% ABV there's no environment for bacteria or mold to grow. As long as you keep the jar sealed and the beans submerged, the extract will remain safe and flavorful for as long as you own it. In fact, extract improves with age: the longer it sits, the more complex and smooth it becomes. Many bakers never "finish" a jar; they just keep topping it off with fresh vodka and beans, maintaining a rolling supply that's always getting better. The only way extract goes "bad" is if you introduce contamination—dipping a dirty spoon into the jar, for example—or store it in direct sunlight where UV light degrades the flavor compounds.
Why does my homemade extract taste like alcohol?
If your homemade extract tastes strongly of alcohol, it's almost always because it hasn't aged long enough. In the first few months, the vanilla flavor compounds haven't fully dissolved and mellowed, so what you're tasting is raw vodka with a vanilla tint. At six months, the alcohol bite starts to fade; at twelve months, it's gone entirely, replaced by a smooth, rich vanilla character. Patience is the fix here—just keep aging. Another less common cause is that you used too few beans, so the vanilla flavor is too weak to balance the alcohol. If you've aged for six months and it still tastes thin, add another bean or two and let it go another few months. The alcohol taste will diminish as the vanilla intensifies.
Can you use rum or bourbon instead of vodka?
Absolutely, and many bakers prefer it. Vodka is the most common choice because it's neutral and lets the vanilla flavor shine without interference, but bourbon adds warm, oaky, caramel notes that complement vanilla beautifully in chocolate desserts and spice cakes. Rum brings tropical sweetness and works especially well with Tahitian beans. Brandy is smooth and sophisticated, a favorite for French-style pastries. The alcohol you choose becomes part of the flavor profile, so think about how you'll use the extract: vodka is the all-purpose workhorse, bourbon is for rich, bold applications, rum is for fruity or tropical desserts. Just make sure whatever spirit you use is at least 35% ABV (70 proof) to extract efficiently. For a detailed comparison, see vodka vs bourbon vs rum for vanilla extract.
Is homemade extract as strong as store-bought?
Homemade extract is typically as strong as or stronger than store-bought single-fold extract, depending on how many beans you use. FDA standards require commercial extract to contain at least 13.35 ounces of vanilla beans per gallon of liquid at 35% alcohol, which works out to about 2.5 beans per 8 ounces. Most homemade recipes call for three to four beans per cup, putting you right in line with or above commercial single-fold strength. If you use five or six beans per cup, you're approaching double-fold territory—extract so concentrated you can use half as much in recipes. The main difference is aging: commercial extract is often aged for just a few months under controlled conditions, while homemade extract typically sits longer, giving you deeper, more complex flavor even at the same vanillin concentration. If you want your homemade extract to match a specific commercial strength, just adjust the bean count up or down.
Your Next Step
The comparison between homemade and store-bought vanilla extract isn't really a contest. Both have their place, and the right choice depends entirely on your baking frequency, patience, and priorities. If you bake often and value quality and savings, making your own is a simple, high-impact project that pays dividends for years. If you bake rarely or need extract now, a good commercial bottle does the job without fuss. And if you're curious, there's no reason not to try both: buy a bottle to use today, start a jar to age for later, and see which one feels like home.
When you're ready to start your first batch, a small bag of Grade B beans and a bottle of vodka are all you need. Set it up on a Sunday afternoon, tuck the jar into a cupboard, and check back in six months. You'll be surprised how good it is—and how easy it was to make. For more ways to think about vanilla in your kitchen, browse our full vanilla comparisons guide, or try our vanilla buttercream four methods compared to see how homemade extract performs against other vanilla forms in a real recipe.



Article Comments
0 commentsNo comments yet — be the first to share how this turned out for you.
Leave a comment